The Crafty Mummy

Crafts. Sewing. Quilting. Crochet. Tutorials.

  • Start Here
  • Welcome
    • Subscribe
    • About Me
      • Copyright
      • Disclosure
      • Privacy Policies
    • Advertise
    • Sharing
      • Recommendations
      • Shopping & Coupons
      • Books
  • Explore
    • Crafts
      • Beading
      • Kids
      • Paint
      • Storage
      • Christmas Crafts
    • Sewing
    • Quilting
    • Stitching
    • Crochet
      • Yarn
    • Life
      • Food
      • Organisation
    • Blogging
      • How To
      • Social Media
      • WordPress Plugins
      • Photography
  • Tutorials
    • Tips
  • Shop on Etsy
  • Shop on Redbubble

Patchwork Scrappy Apron

by Tonya Grant |Filed Under: Sewing, Tutorials Get a Weekly Update of all Articles

After we moved into our house, I noticed something a little odd. Lots of my shirts started to get little holes in the front of them, in a particular spot around about where the button of my jeans sat.

For ages, this was a mystery to me.

Was I catching my shirts on my jeans somehow? Was the seatbelt in my car rubbing in that particular spot? Was my handbag somehow catching there? What activity was I doing regularly that could be causing these holes in so many shirts?

Eventually, I worked out that the holes were being caused by the edge of my kitchen bench. Every day, usually more than once, I would lean against the bench as I did the washing up at the sink. Although I hadn’t noticed it until I went looking closely, the edges of my bench were rough, like fine sandpaper. The edge was rubbing my shirt against the hard surface of the button of my jeans or shorts as I worked and eventually becoming holes.

How annoying!

My answer to stop ruining more shirts? 

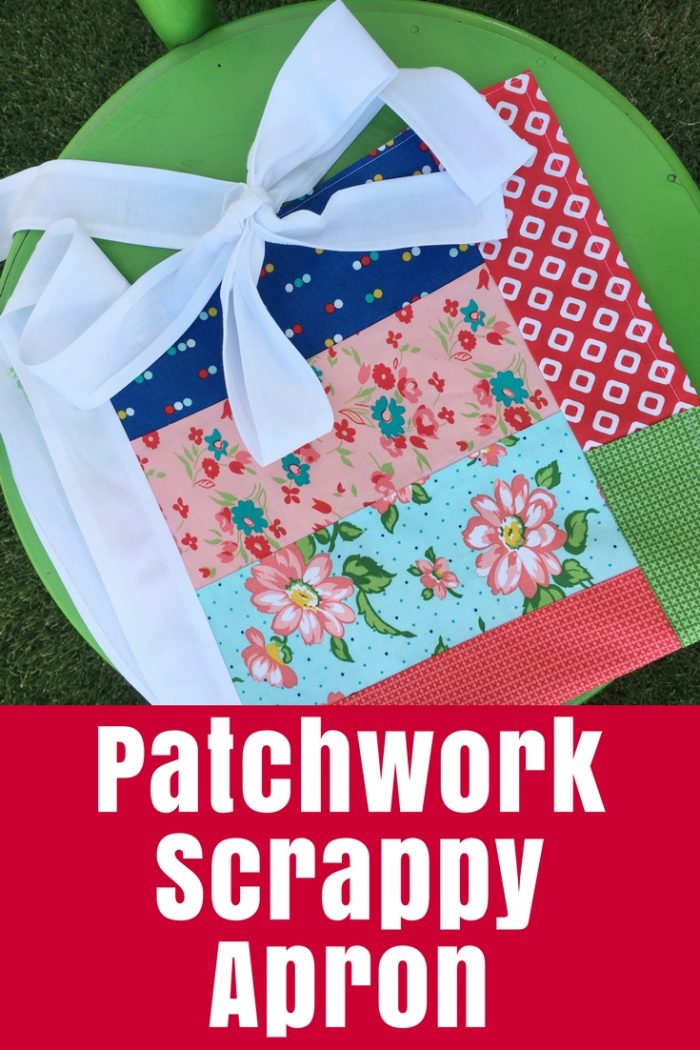
Aprons. Yep. Old-fashioned aprons.

If you happen to drop by while I’m washing up or cooking, you will almost always find me wearing a half apron so that I don’t get more holes in my clothes.

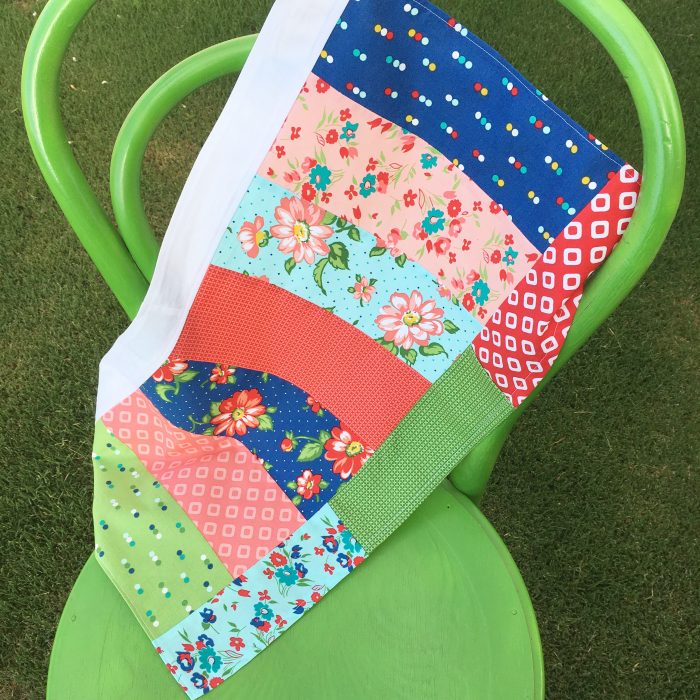
When I was creating my quilt in a day last week, I had some short strips of fabric left from my fat eighth bundle. Such pretty fabric that I had to make something with it. So I created a new apron that will make me smile in the kitchen.

The fabric is Dixie by Cluck Cluck Sew for Windham Fabrics. I just love the mix of modern pretty flowers and patterns with red, aqua and royal blue together.

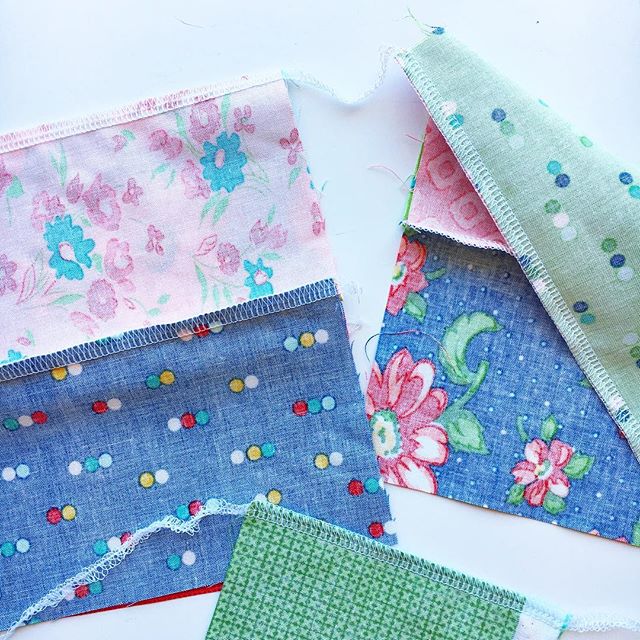
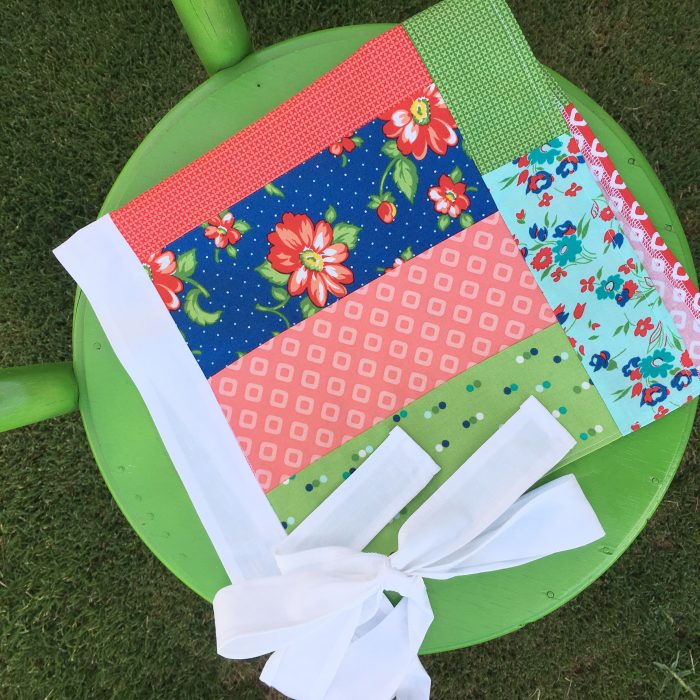
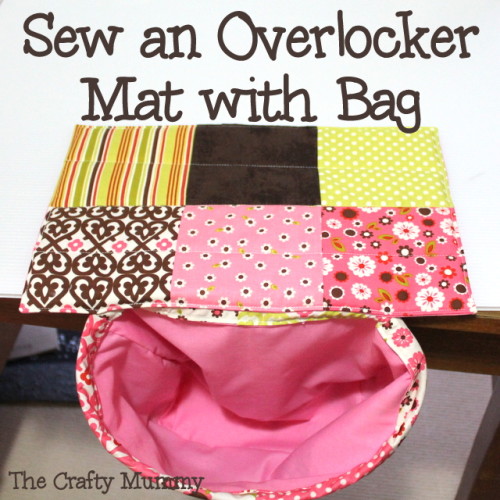
I actually used my overlocker (‘serger’ to my U.S. friends) to create this project – something I haven’t tried before. The overlocker was perfect for joining the pieces and trimming the edges as it went along.  Once I had joined my pieces into a panel, I hemmed the edges with my sewing machine. I used two jelly roll strips for the waistband, joining the two with the overlocker, then overlocking all around the edges. I hemmed the top edge and the ends before joining the strip to the apron panel with the overlocker. Finally, I hemmed the rest of the lower edge of the waistband strip where it wasn’t attached to the panel.

How to Make a Scrappy Apron

  • Join your scraps into a panel large enough for your apron front
  • Overlock and hem the raw edges to prevent fraying
  • Use a couple of strips for your waistband – overlock and hem these too
  • Join the waistband to the apron panel
  • All done!

All up, this project probably took less than half an hour. The overlocker makes it super quick! I really must use my overlocker more.

After finding tiny holes in my shirts, I always wear an apron in the kitchen. Here's the patchwork scrappy apron I made recently using my overlocker.
tutorial sew an overlocker mat with bag  

Filed Under: Sewing, Tutorials

« Snail Day
Wynne the Bunny »
Disclosure: There are affiliate links in this post.  This just means that if you click through and choose to purchase something I may get a small commission - at no extra cost to you, of course.  This helps me keep the content here at The Crafty Mummy free for everyone.

I love to chat so please leave me a comment or ask a question.

Don't stress if your comment doesn't appear immediately - sometimes I have to moderate comments thanks to spam visitors, but the comments from real readers will always get published. Scroll down to add your thoughts or ask a question.

Comments

  1. Rhonda Cratty says

    February 8, 2017 at 1:42 AM

    What a great idea for favorite little pieces of material left over from big project.

  2. Leanna Levine says

    February 15, 2017 at 7:48 AM

    That’s it, I’m bookmarking your blog! 🙂 I will include this one on my list of fun and easy sewing projects for beginners. I will publish a roundup on my website here very soon, I will make sure to link up to this one.

    Thanks for the share.

    – Leanna

  3. Janine Evans says

    March 1, 2017 at 2:39 PM

    I love this. Miss 11 is doing sewing at school. Maybe I can convince her to make me one using my machine. Thanks for sharing.

  4. Deb Bremer says

    June 1, 2017 at 7:00 AM

    what a great idea thank you!

  5. Nancy Hayden says

    June 21, 2017 at 10:34 PM

    Do you have tutorial of bib apron, with the sash that goes along a hidden hem on sides of bib, leaving space to go behind neck then down other side of bib and ties in back?

Hi! I’m the CraftyMummy

Tonya is the voice behind The Crafty Mummy. She dabbles in lots of different crafts – patchwork, quilting, cross-stitch, scrapbooking, knitting, crochet and sewing. This is the record of projects she has done, and the projects she dreams of getting to! Read More…

Search

  • Email
  • Facebook
  • Instagram
  • Pinterest
  • Twitter
  • YouTube
Shop my Affiliate Favourites

Fat Quarter Shop for Fabric and More

Grab the Sew Sampler Box Here

AccuQuilt for Cutting Machines and Dies

QuiltyBox for Monthly Treats in the Mail

CreativeBug for Craft Classes

Pretty Darn Cute for Blog Designs like mine

Creative Market for Fonts, Images, Themes and More

OzGameShop for All the Games

Adrift for Fashion you’ll Love

Kindle Unlimited Membership Plans

Kindle Book List

Click to shop my kindle book list
Shop my Amazon Influencer Shop
Join the CrochetU and learn to crochet
New to TheCraftyMummy.com? Click here to see more
Blog Tools I use for TheCraftyMummy.com

Grammarly

Aweber for email newsletter

CoSchedule to stay organised and share

Milotree for social media

Genesis for blog framework

FoodiePro is my theme

Hosting with WPEngine

Powered by

Recent Articles

Disclosure: There are affiliate links on this site. This means that I may get a commission if you choose to purchase after browsing via these links - at absolutely no extra cost to you, of course. I only recommend products which I use and love, or that I think will be quality products that will be useful to my readers. It is the affiliate links in this site that help me keep my tutorials free of charge. Thank you!

Looking for something? Search here:

Copyright 2015 The Crafty Mummy · Built using Genesis Framework & Foodie Pro Theme