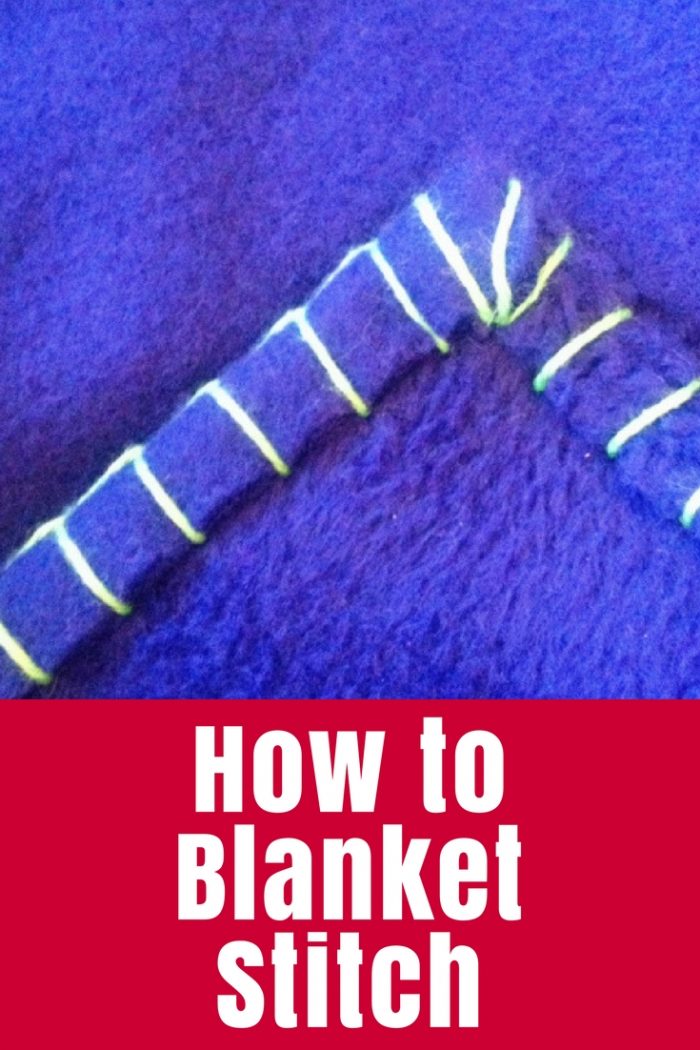
Learn how to do blanket stitch around your blanket to create a neat easy finished edge with this tutorial.

Polar fleece fabric is fabulous! It doesn’t fray so you don’t need to finish the edges. But I like the look of edging around blankets so I often stitch my edges with a blanket stitch.
How to Blanket Stitch
- Start by folding your edge over – once or twice, whichever you prefer.
- Pin or peg the fold in place.
- Thread up your needle with contrasting thread. I often use perle coton as it is a little heavier than other thread but you could also use stranded embroidery floss.
- Knot the end.
- Start by stitching up into the fold so the knot is hidden within the folded edge.

- I stitch from right to left when I blanket stitch so you can see that I’ve pegged my edge to the left of where I started stitching.

- Swing your thread over the left of your needle.
- Stitch into the top side of the fabric, just below the folded edge.
- Tilt the needle up at the back of the fabric and make sure the thread is behind the needle.
- Gently pull the needle through until the thread creates box along the top of the fold. Don’t pull it too tight.

- This is what it should look like if you look at the top of the fold.
- Continue stitching into the front of the fabric each time.
![]()
- As you come to your pins or pegs, remove them, of course.
- At corners, you’ll do three stitches into the same spot to go around the corner.
This blanket is actually going to be the last of my felt projects for this week so stay tuned tomorrow to see how I added the felt.
I have also written these projects with felt this week:


Summary

Article Title
How to Blanket Stitch
DescriptionLearn how to do blanket stitch around your blanket to create a neat easy finished edge with this tutorial.
Author
Tonya Grant
Published on
TheCraftyMummy.com


Well, Tonya, we have that in common! I make ponchos (for donation) and can’t stand the raw edges! I love the look of blanket stitch around the edges and use variegated acrylic knitting yarn since polar fleece is also acrylic.
This is such a simple, clear, and handy tutorial! I’ve listed it on my website with other resources for beginning sewing at: http://www.sumopeanut.com/post/simple-beginning-sewing-resources/
Thanks Victoria
Great tutorial, I love doing the blanket stitch, my problem is when I need new thread, I never know how to start or where, it always seems to look bad. Thanks Vicky